breakfast+snacks / chocolate / recipes / sweet+desserts / vegan / vegano
As pastry chef I should say in advance that this recipe is very different from the original donuts, so please forgive me if you are a fan and loyal follower of such a preparation (like my beloved father in law is) because I use a sponge cake nd the donut appearance is pretty well achieved. It is a very simple game so I hope no one is offended.
I should also say that the recipe for the cake is not mine either. It is a recipe by an amazing American pastry chef called Fran Costigan of whom I am a big fan. All her pastries are vegan and although I don´t like tagging things and people, and I am not vegan, I like challenges and love having the opportunity to do different things, healthier than the traditional ones. Because there are vegan books loaded with ingredients which don´t look healthy to me or which are simply inedible. This woman uses recognizable ingredients and besides that, all her recipes turn out to be very good and are really delicious, something which I highly appreciate. The recipe of today´s cake is so yummy, and the cake is so spongy which I felt compelled to share it with you because it is one of those indispensable recipes which should be in any good recipe notebook. I have modified slightly the recipe but it is 100% hers. It looks perfect in a Bundt-like mold which nowadays can be easily purchased everywhere.
I recommend you an American brand called Nordic Ware. They are quite expensive but will last for a lifetime if you take care of them. Besides, they have attractive shapes which will make any cake dough become a piece of art.

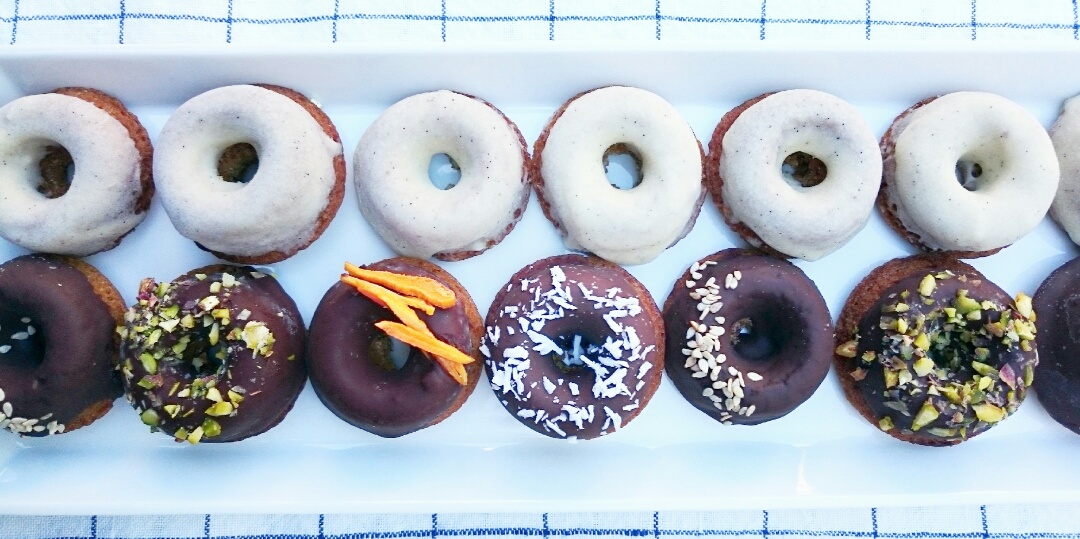
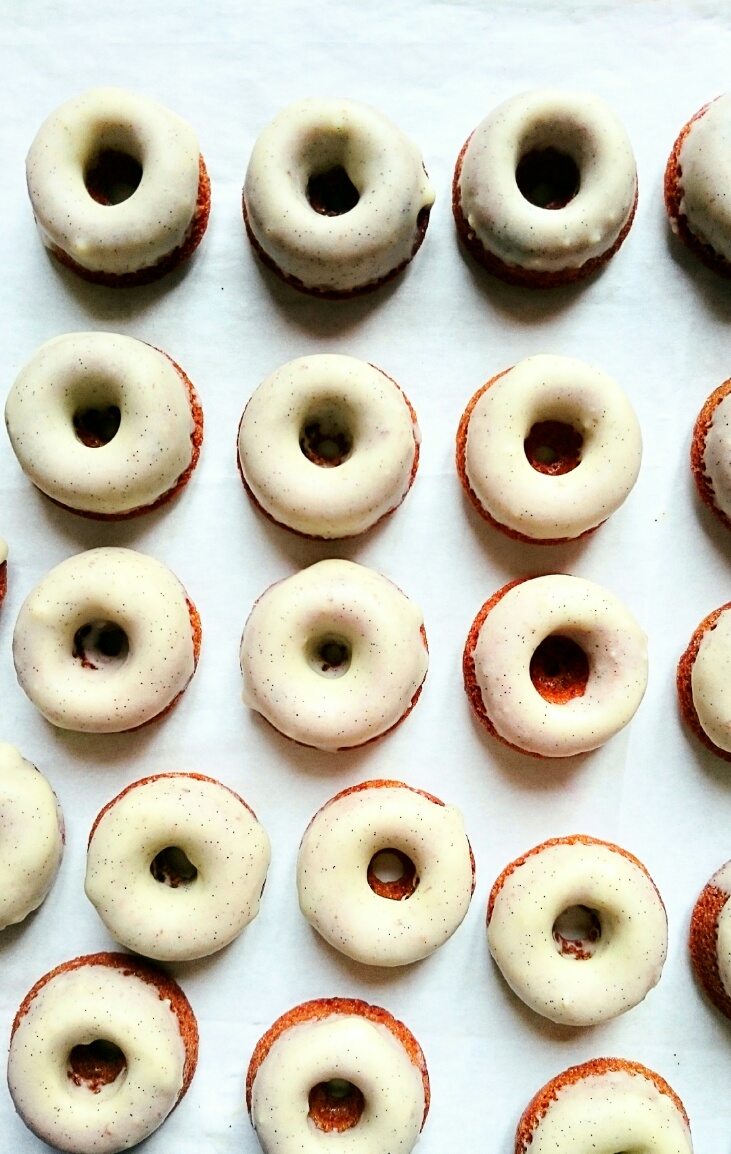
The thing is that one day I bought some mini-donuts molds because it occurred to me that I wanted to cover something else with the white chocolate and vanilla coating of the macadamia truffles. ( although I modified the recipe a bit making it easier). It was a completely unconscious mental association but I thought of Costigan´s orange cake to go go with the white chocolate glaze and the result was spectacular! I brought them to a kid’s birthday party and they were gone before serving them in the table. I made a tower with them and it looked quite funny. Although I should clarify that if you decide to make a big size cake, you could also place the coating over the cake and decorate it with some coconut chips and black sesame and the result will also be a success.
Later, as my mind never stops and I am always mulling things over, I thought of other colors to make them look even funnier. I thought first about chocolate I suppose having that traditional orange-cacao mental association, but you could make them of pink color using the idea of the pinky bonbons and adding a bit of beet juice or green with spinach juice, or even matcha tea! But let me tell that after a few trials, this black chocolate glaze is AMAZING!! You can use it for any other cake you want to cover. It is so shiny and delicious!
It is important to know – for a better organization – that the mini-donuts can be kept in the freezer so that you can make them in advance and make the chocolate coating the same day you are ready to serve them. Or you could also freeze them coated.
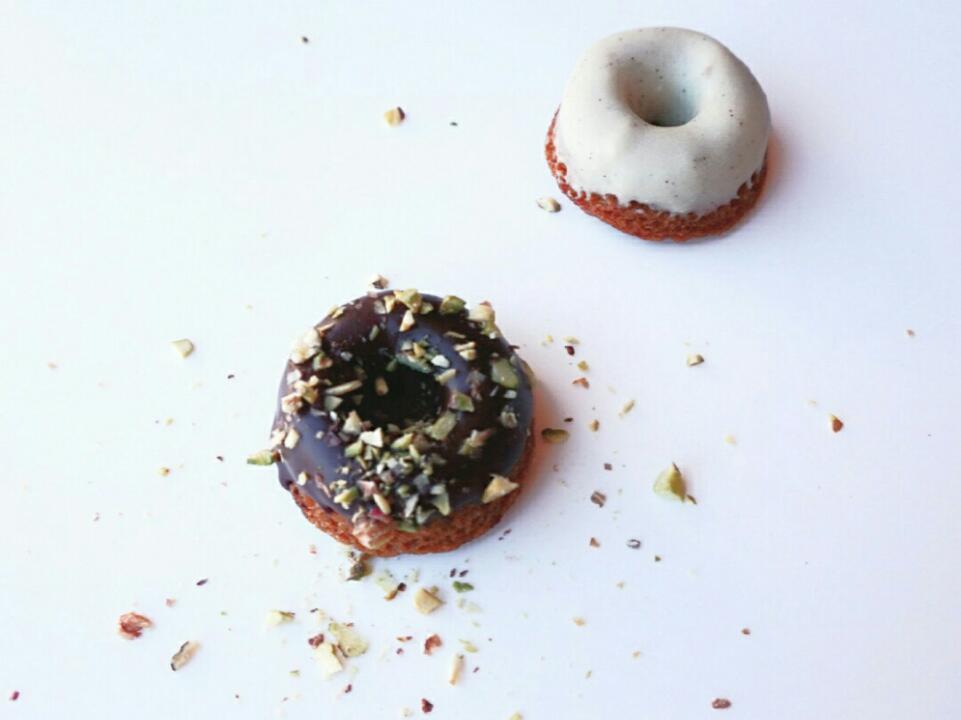
I prefer not to decorate the white donuts because they have this clean look with the vanilla seeds I like to see. But the dark ones, feel free to decorate them with what your imagination is up to: cocoa nibs, dehydrated mango slices, coconut, cacao powder, sesame seeds, pistachios or other nut…
My last tip in this post is a general piece of advice for pastries. Whenever you need to blend two different mixes, one liquid and another solid (flour…) in a cake, muffin or any other sweet preparation, you should ALWAYS pour the liquid part over the solid part. As my dear teacher Jordi Butrón of the school “Espaisucre” said, “THE MILK OVER THE COLACAO” and this way, you will never forget which order you need to follow. And don´t forget either to use organic oranges because you will grate the skin!
Ingredients (recipe of the cake slightly adapted from Fran Costigan) (makes 39 units)
orange cake::::::::::::::::::::::::::::::::::::::::
120 gr of wholemeal spelt flour
120 gr of semi-wholemeal flour
1 tbsp of bicarbonate
1/2 tsp of baking powder
1/2 tsp of salt
125 gr of coconut sugar
75 gr of olive oil
130 gr (1/2 cup) of organic oranges juice
125 gr (1/2 cup) of almond milk
(or any other vegetable milk)
1 tbsp of apple vinegar
1 tsp of vanilla extract
1 and 1/2 tbsp of orange zest
(1,5 big size oranges)
white chocolate glaze::::::::::::::::::::::::::::::::::
60 gr cocoa butter
40 gr coconut milk
40 gr maple syrup
1/2 vanilla pod
pinch of salt
black chocolate glaze::::::::::::::::::::::::::
60 gr cocoa butter
40 gr coconut milk
40 gr maple syrup
1/2 vanilla pod
pinch of salt
60 gr of 72% black chocolate chopped
::::::::::::::::::::::::::::::::::::::::::::::::::::::::::::::
chosen toppings: sesame seeds, dehydrated mango, cocoa nibs, coconut, chopped pistachios…
Instructions
- Start with the cake.
- Heat the oven to 180°C. Oil with coconut oil the mini-donuts molds.
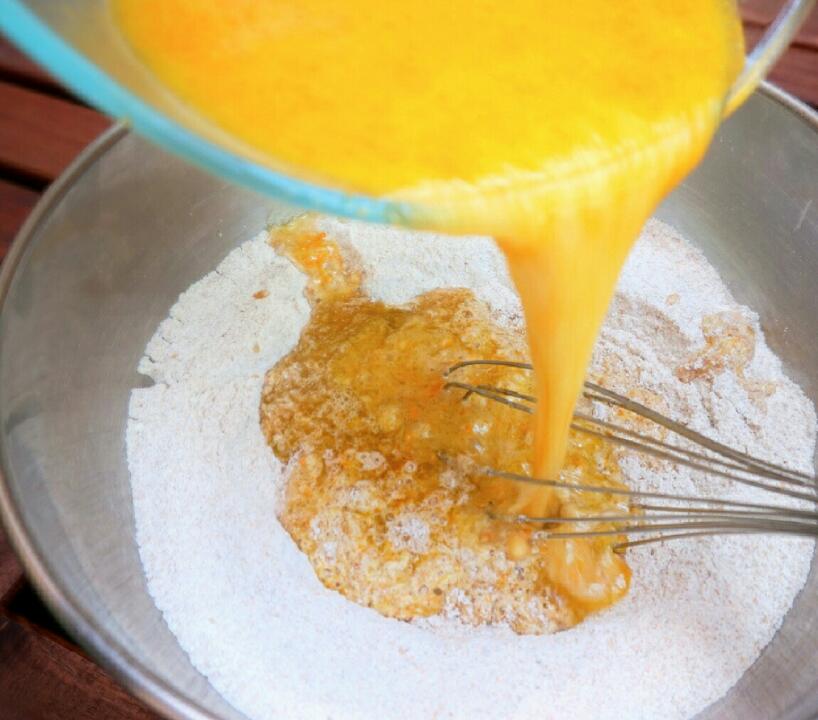
- Grate the oranges with a microplane-like grater until you get 1 and 1/2 tbsp. Cut the oranges and juice them. Set it aside. Mix in a big bowl all the solid ingredients: flours, bicarbonate, baking powder, salt and sugars. Mix with a whisk so that everything gets well aired.
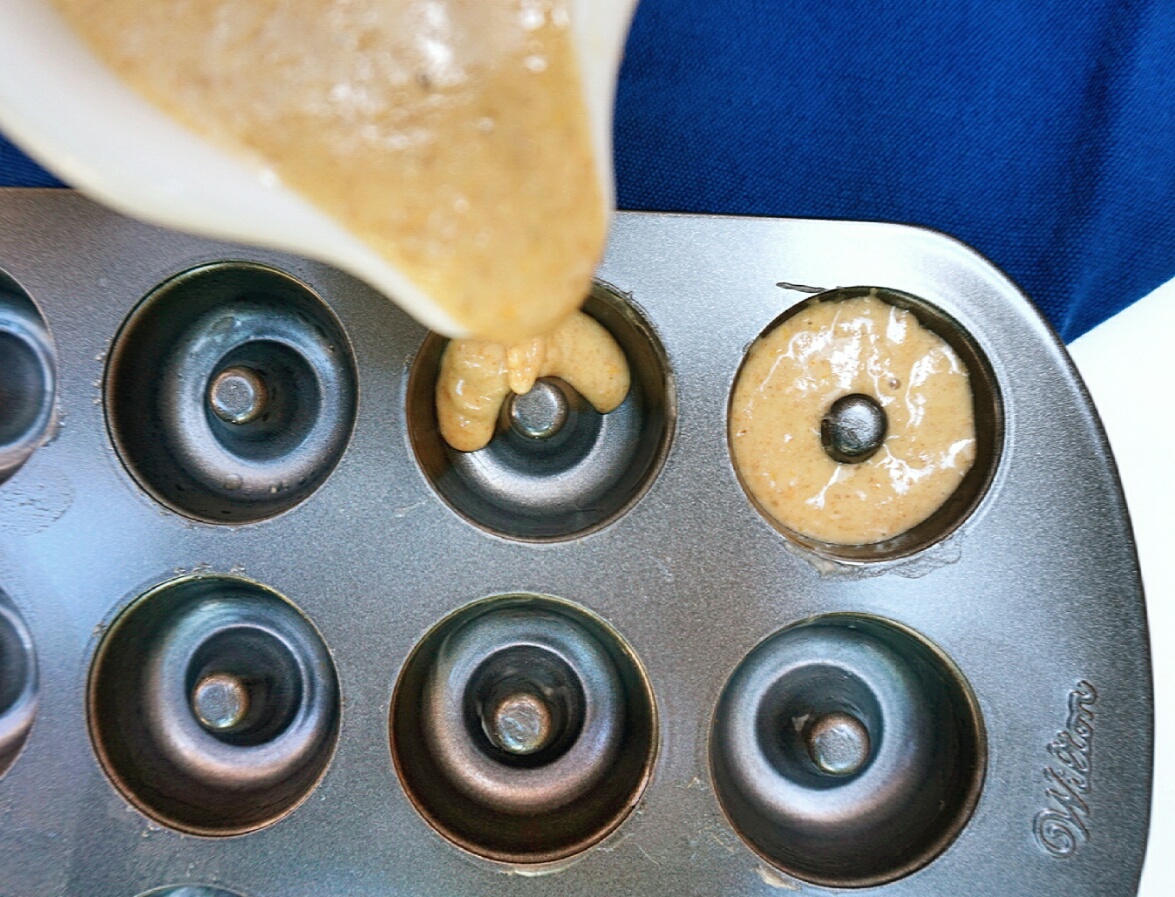
- Mix the liquids in the other bowl: olive oil, orange juice, vegetable milk, vinegar, essence and orange zest. Stir them a couple of times and pour them over the bowl with the solids. Stir them again until you see that everything is well integrated (but don´t stir it too much). Pour the mix in a small jar and fill up the molds up to a 3/4 of its volume.
- Bake for 10/12 minutes or until you see they get a beautiful golden color. Knock the plate, let them stand on a rack for 5 minutes and take them out of the molds. Let them cool on the rack. If you are not going to use them that day, freeze them placing them on a tray inside the freezer, and whenever they get frozen put them in a bag.
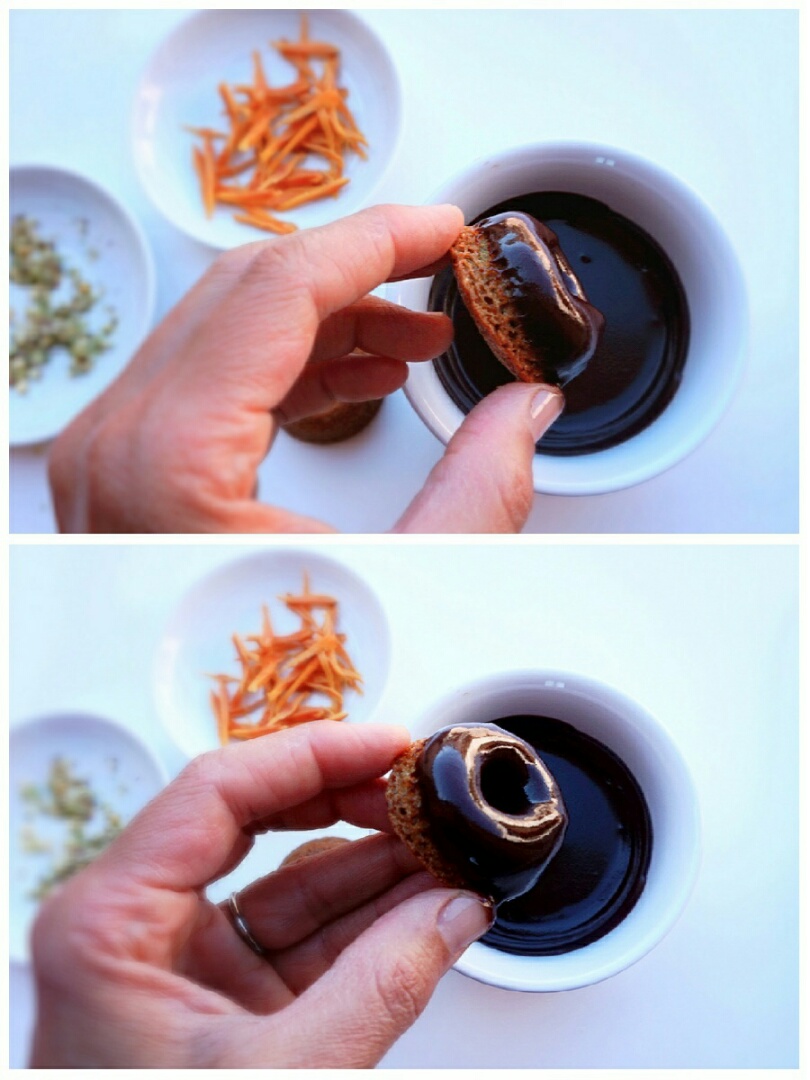
- For the white chocolate coating, chop the cocoa butter and melt it over a bain-marie.
- Prepare your donuts on a tray.
- Glaze them one by one. The glaze will turn whiter once it is cold.
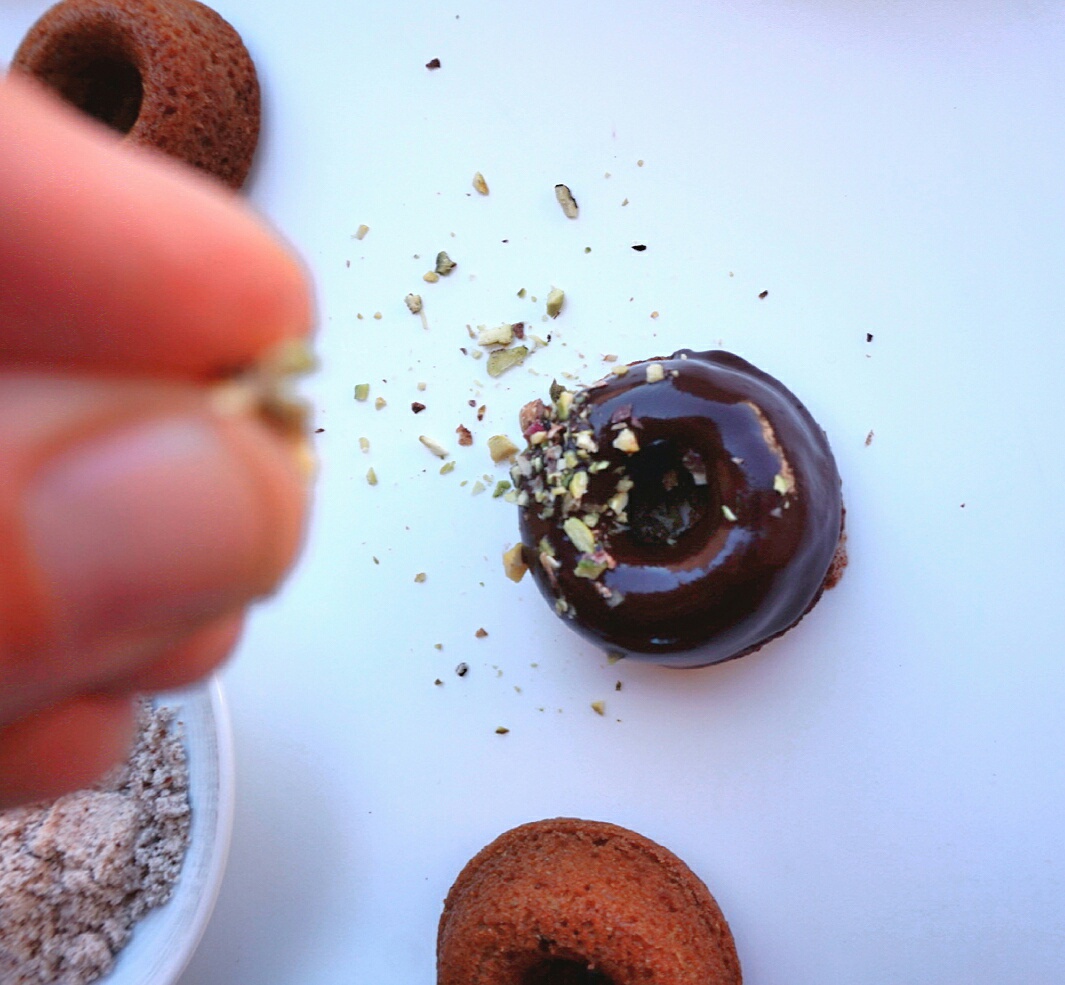
- For the black glaze, melt your cocoa butter. Get your toppings and donuts ready near you. Once the butter is melted add the rest of the ingredients, put it back on the heat for a minute, and let the dark chocolate melt slowly. When it is shiny, glaze the donuts one by one, stopping to decorate them before the chocolate solidifies.
- Put them in the fridge, and get them out 10 minutes before serving.
- Enjoy!